Showing posts with label Prima Fairy Belle. Show all posts

Friday, June 7, 2013

Scrapbook Adhesives by 3L- Happy Birthday Card Tutorial

Hi There!
I have a tutorial on making a layered shabby chic Birthday Card on the Scrapbook Adhesives by 3L blog
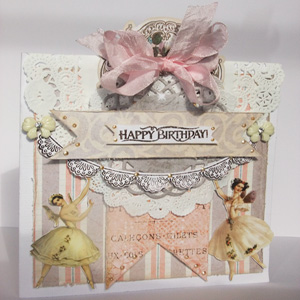
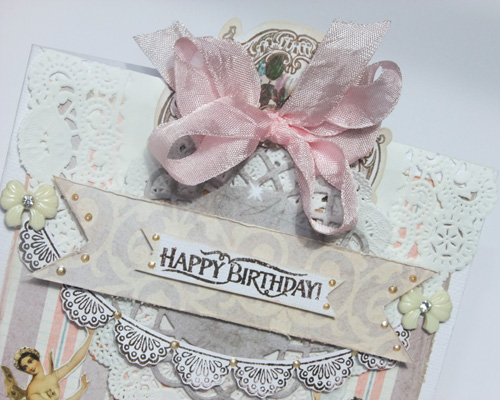
I have chosen some girly papers & products with the idea of making a pretty card for a young girl. I am using Prima Fairy Belle collection with a collection of Scrapbook Adhesives by 3L!
Start by cutting a piece 6″X12″ from white cardstock & fold in half so that you have a 6X6″ square card base.
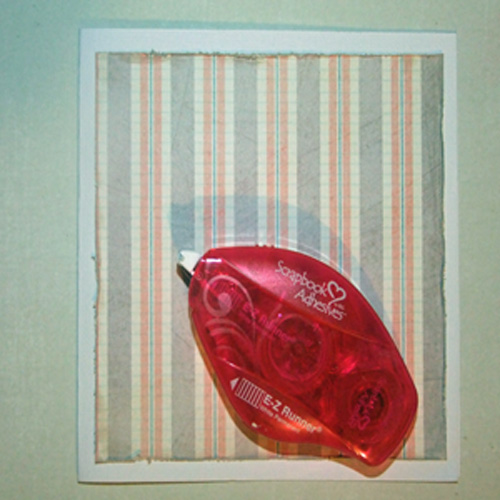
Cut Fairy Belle in Firefely 5.5X5.5″ & distress & ink the edges. Run the E-Z Runner Permanent Strips Refillable around the edges of the firefly piece & stick to white card base.
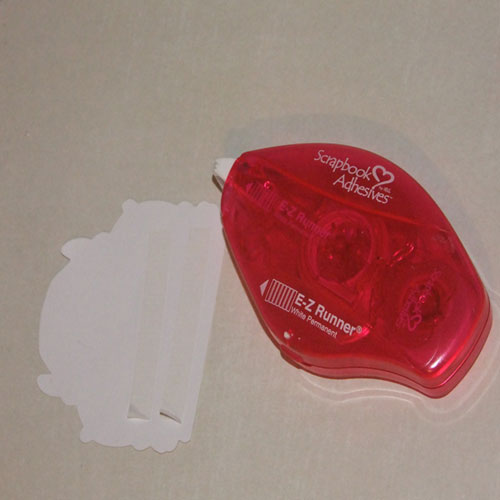
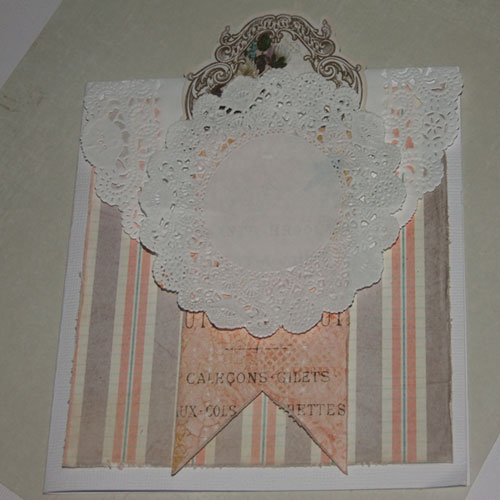
Use a Medium size White doily. Apply E-Z Runner Permanent Fine Adhesive to half of the doily. As the doily is quite a thin paper the E-Z Runner Permanent Fine Adhesive is a much finer, lighter texture tape so it won’t show through the paper of the doily.
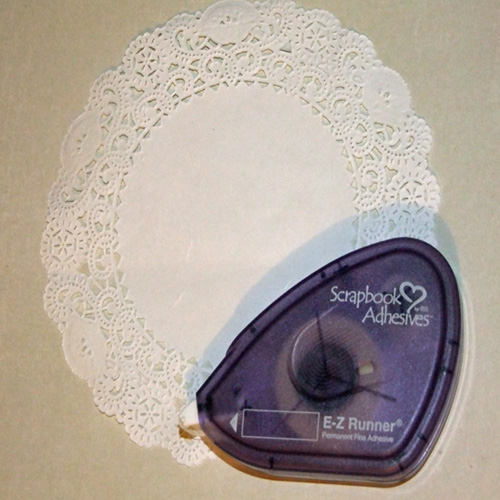
Stick the doily to the top/centre of the card with half the doily folding over the back of the card
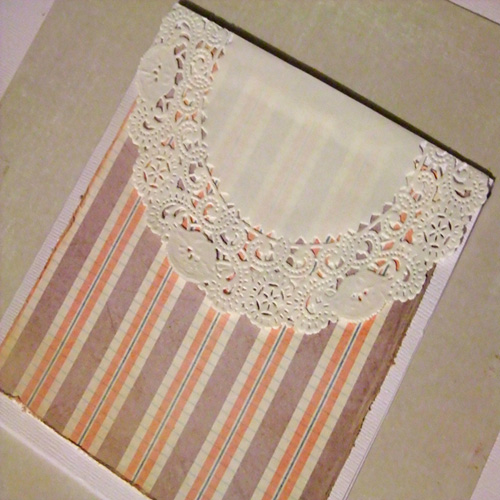
Cut a Fairy Belle Notecard in half. Use the E-Z Runner Permanent Strips Refillable & apply to the bottom half only
Stick the notecard top/centre of doily with about 1/4 overlapping the top edge.
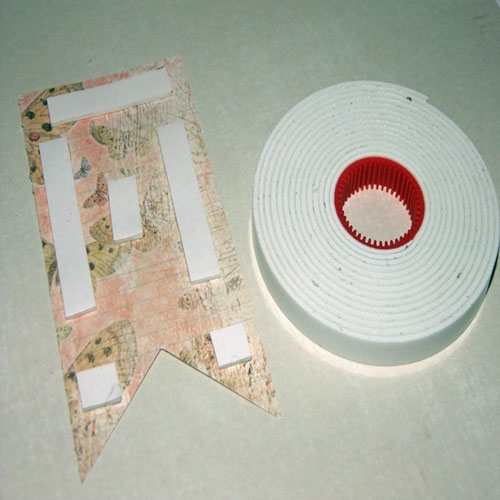
Cut La Spa sheet 2X5″ Pendant. Place Crafty Foam Tape along edges. I prefer to use the Crafty Foam Tape for larger pieces
Use a small white doily & apply E-Z Runner Permanent Fine Adhesive in centre. Again I’m using the E-Z Runner Permanent Fine Adhesive on the doily as the paper is more delicate & the tape in the E-Z Runner Permanent Fine Adhesive is quite fine & will not show through
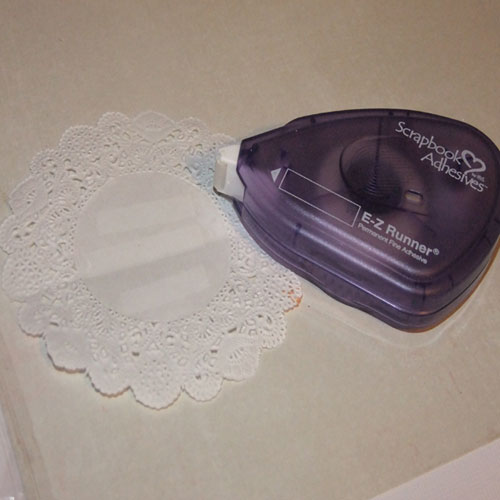
Stick the doily over the top of the pendant join
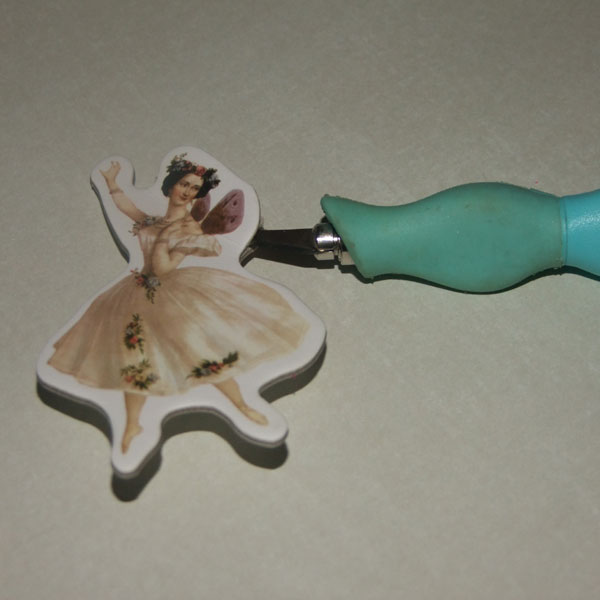
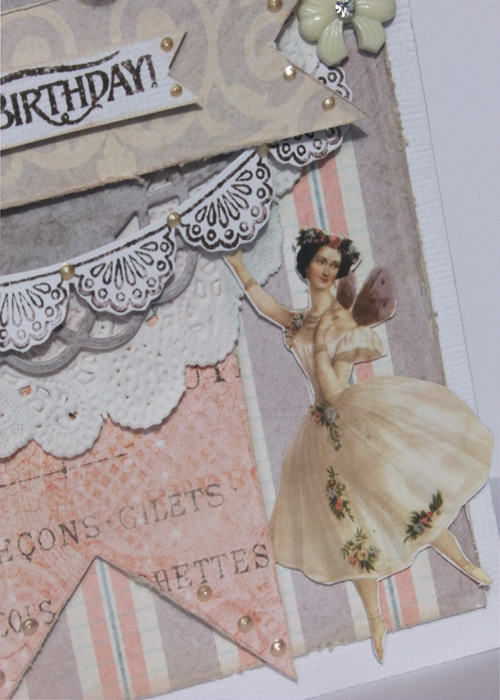
Take the Fairy Belle Chipboard piece Ballerina Fairy. I don’t like the white around the edges & prefer more detail so I am going to fussy cut it. Use a craft knife to split it in half
Once the chipboard piece has been fussy cut the image is very delicate with very thin areas. It is quite hard to stick down so I find this the most effective way. Use Adhesive Sheet 6″X4″/10CMX15CM. Take 1 sheet & cut in half. Remove yellow release liner. Stick the chipboard piece down (good side facing up). Fussy cut around the chipboard image. The Adhesive sheet now fully covers the chipboard piece even in the tiny intricate places!
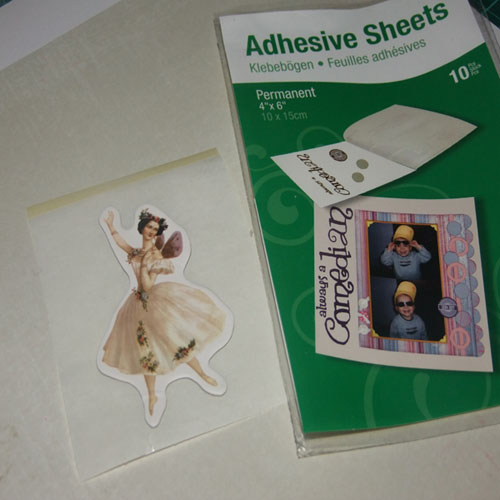
Repeat this process with a second Fairy Ballerina Chipboard piece. Stick either side of pendant
Die Cut a Spiral Circle from Fairy Belle Firefly using the grey side
Use 3D Foam Squares-White Variety Pack. I love this pack as it has a mix of large & smaller size foam squares. Use the larger size & apply to the back of the die cut
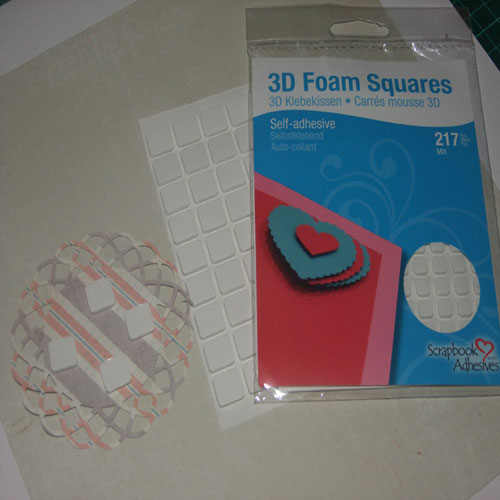
Cut 5X1 1/4″ piece from Fairy Belle Summer Dream. Distress & Ink edges. Use 3D Foam Squares-White Variety Pack again using the larger size in the pack. Apply to back of pendant
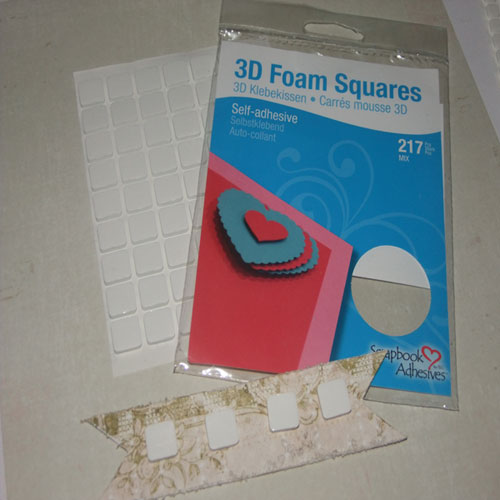
Stick on top of die cut spiral circle
Use some scrap white cardstock. Stamp a banner in Brown ink. I have used Just Rite Clear Buntings & Banners. Fussy cut the banner. Apply foam tape to the back using 3D Foam Squares-White Variety Pack using the small size this time. The smaller squares are a perfect fit to place under each banner
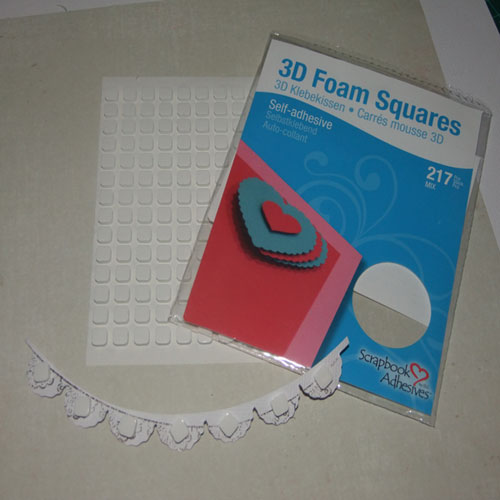
Stick this under pendant just above the Fairy Ballerinas hands
Stamp a sentiment on some scrap white cardstock in Brown ink. I have used Just Rite Clear Buntings & Banners (Happy Birthday). Fussy cut a small pendant around the stamped sentiment approx. 2.5X0.5″. Ink the edges. Apply 3D Foam Squares- White Variety Pack using the smaller size
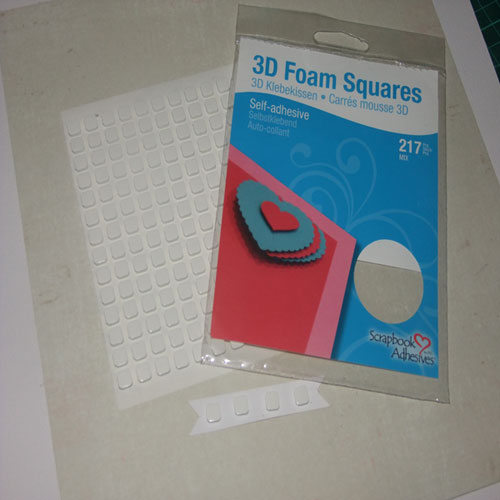
Stick this on top of the larger pendant
Finish decorating card. I have used Jenni Bowlin bows in cream on either side of pendant. They are self adhesive but to make sure they stay down I have used Dodz Small on each bow. Use Liquid Pearls on pendants & banner
Tie a bow with seam binding. Apply Dodz 3D in centre of Bow & stick down at top of card
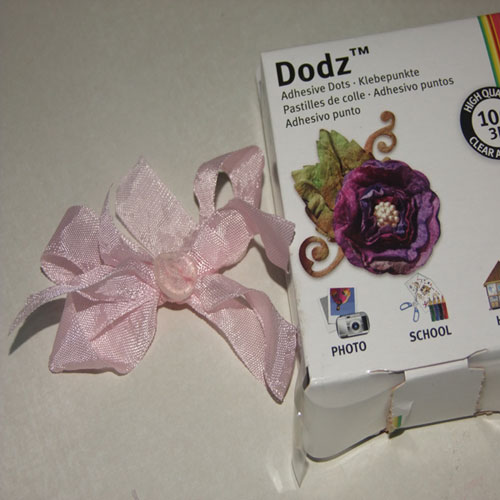
& now you have a shabby chic card with lots of layers & dimension! Here are some closeups


Dodz Small Dodz 3D Adhesive Sheet 4 x 6"
3D Foam Squares White Mix Crafty Foam Tape White 13" E-Z Runner Permanent Strips Refillable dispenser
E-Z Runner Permanent Fine
Other Supplies Used
Prima Fairy Belle Paper
JustRite Clear Stamps
Ranger Ink Liquid Pearls
Jenni Bowlin Bows
Megs Garden Doilies

Thanks for looking!

Friday, February 1, 2013

My first post for Imaginarium Designs!!


Hi there!

I'm so excited to be sharing my first post with you here at Imaginarium Designs! Imaginarium Designs have so many gorgeous products but I am always drawn to the twords/phrases first. I loved the Brother & Sister phrase chipboard & have so many photos that I can use with it!


 Start by applying a coat of gesso. Use a sponge & apply Stampin Up 'Bashful Blue' all over.  Then use Prima chalk ink in Farmer Jeans applying a heavy layer to the bottom of & and Sister adjusting the pressure to a medium layer half way up to Brother. use a sponge & Stampin Up 'Bashful Blue' & gently blend the colours half way up to Brother. As a top coat apply Shimmerz in Sky Blue to the top half of Brother.
To create a vintage/shabby fence first apply some Impasto quite roughly with a small trowel. Once dry apply a coat of Ranger Distress crackle paint in 'Walnut Stain'. When it dries the pint will crack to show the impasto underneath.
Apply a coat of gesso. Once dry use Shimmerz in 'Sky Blue' for a gorgeous translucent colour. Finish off with some bling from Websters Pages

Imaginarium Designs Products Used

IDP0049- Brothers & Sisters

IDB0004- Spade top Picket  

IDT0032- Edward Relief Small

Other Products Used
Websters Pages Everyday Poetry papers
Websters Pages Everyday Poetry tag
Prima flowers
Prima resin bird

I really wanted a shabby chic/femminine look for this cute photo of Evie. You can't go wrong with these beautiful butterfly pieces to really girly up the page!

 Apply a coat of gesso. Once dry apply Versa Mark ink in 'Ash Rose' to the bottom half & Versa Mark ink in 'Laurel Leaf' to the top half. To give some extra bling use some Ranger Liquid Pearls in 'Petal Pink' & Viva Pearl Pen in 'Light Green'
Apply gesso to the lattice door & butterfly. Once dry apply a coat of Ranger Distress Crackle Paint in 'Shabby Shutter'. I applied a really thick coat so that it would crackle more giving a more shabby/distressed look. Apply Versa Mark 'Petal Pink' to the entire butterfly. Use a Viva Pearl Pen in 'Ice White' to the top half of the butterfly. Paint some Modge Podge on the bottom half of the butterfly. While it is still wet sprinkle Shimmerz Enamelz in Sparklicious then dry with a heat gun.

Apply gesso to the oval bracket. Once dry apply white acrylic paint. Ink the edges with Ranger Distress Ink in 'Walnut Stain' to the edges. Add some Liquid Pearls in 'Petal Pink'.

Imaginarium Designs Products Used
IDP0005- Just You

IDT0031-Monarch Butterfly

IDS0038-Lattice Door

Other Products Used
Prima Tea Thyme Paper
Prima Fairy Belle Paper
Kaisercraft Pickled Pear paper
Prima Almanac notecard
Prima Flowers
Prima Resin Bird

Thankyou for joining us today!You can find these Imaginarium Products here.

To see more of my projects you can find my blog here

Cheers XX

Saturday, January 26, 2013

Scrapbooking Memories Blog Hop/Imaginarium Designs

GDAY!!!

Happy Australia Day!!!!


Australians all let us rejoice for we are young & freeeeeeeeeeeeeeee. (u guys r so lucky u can't hear me sing!!)

Imaginarium Designs are so excited to be part of the Scrapbooking Memories Blog Hop


Some of the Aussie Imaginarium Designs DT girls have posted some extra inspiration for you!

Here is a new page I have created using Imaginarium Designs Chippies


Imaginarium Designs Swirly Frame 3"X2" IDFR0004
Imaginarium Design Alphas Capital Letters IDAUC0001

To alter the frame I first gave a coat of gesso, then painted using Shimmerz Blingz Winter Green. I then applied impasto to the tips of the spade shapes on the frame. Once dry I dabbed some Shimmerz Blingz in Spiced Cider on the tips.
The letters were also given a coat of gesso. I then covered each letter in impasto making sure that the application was rough so that it gave a real textured look. Once dry I painted the letters with yellow acrylic paint. When the paint dried I used the Shimmers Blingz Winter Green over the top.


Imaginarium Designs Four Circles Border IDB0003

Apply a base coat of gesso. The paint with acrylic yellow paint. Once the paint dried I used Shimmerz in Bunny over the top to brighten the yellow & give it a nice shine. I then used  Shimmerz Blingz in Spiced Cider with a fine paint brush & randomly followed the lines on the border. I was inspired by the 2tone paper colour & wanted to try & recreate that with the chipboard colour.


Other products used
7 Dots Studio- Domestic Godess- Raspberry Pudding
7 Dots Studio- All I Ever- Sandy Beach
Graphic 45- Tropical Travelogue paper & chipboard stickers
Prima vine
Petaloo flowers
Seam Binding

I have shown this page before but I just luv this pic of Evie so I thought I'd share it again!


Imaginarium Designs (Border) Embellishment 1 IDB0001
I used a thick coat of texture paste on the chipboard then painted with Ranger Distress Crackle Paint in Walnut Stain


Products used
Prima Fairy Belle Papers, chipboard sticker & notecard
Prima flowers, wooden tag, say it in crystal mini flourishes & heart resin
Kaisercraft scrabble letter stickers


If you would like to participate in the hop then here is the Hop order . Don't forget to check out the extra inspiration at Imaginarium Designs where you will find the Aussie DT girls blog links!


AUSSIE BLOG HOP

1.      Studio Flergs http://flergalicious.com/blog
2.      Kaisercraft http://www.kaisercraft.com.au/blog/
3.      D-Lish Scraps http://d-lishscraps.blogspot.com.au/
4.      Imaginarium Designs www.imaginariumdesigns.blogspot.com
5.      Digi-licious Designs http://digilicious.typepad.com  
6.      Purple Pumpkin http://purplepumpkincrafts.blogpsot.com.au
7.      Manor House Creations http://manorhousecreationsblog.com  
8.      The Trinket Track http://thetrinkettrack.blogspot.com.au
9.      Fynmark http://rubyrockit.typepad.com
10.  Charm’s Creations http://ourbrightstarsandus.typepad.com
11.  Words Or Whatever www.wordsorwhatever.blogpsot.com.au
13.  Darkroom Door http://blog.darkroomdoor.com
14.  Flourish with a Bling http://www.flourishwithabling.com.au/blog/

Scrapbooking Memories blog www.scrapbookingmemories.com.au

Enjoy the hop!
Cheers